This guide covers the full process: engineering requirements, formwork preparation, concrete placement, drainage, and post-pour inspection. It's written for licensed concrete contractors, hillside specialists, and informed property owners who want to understand what a properly executed board-form retaining wall actually requires — before committing to a project that offers no do-overs once the concrete cures.
Key Takeaways
- Engineering for lateral soil and hydrostatic loads comes first; board texture and aesthetics follow
- Proper board treatment and a quality form release agent directly determine finished texture quality
- Drainage behind the wall is not optional — hydrostatic pressure is a leading cause of premature wall failure
- Always cast a test panel before the full pour to confirm board texture, mix design, and release agent performance
- LA County requires permits for walls over 4 feet (footing bottom to wall top); Ventura County's threshold is 3 feet
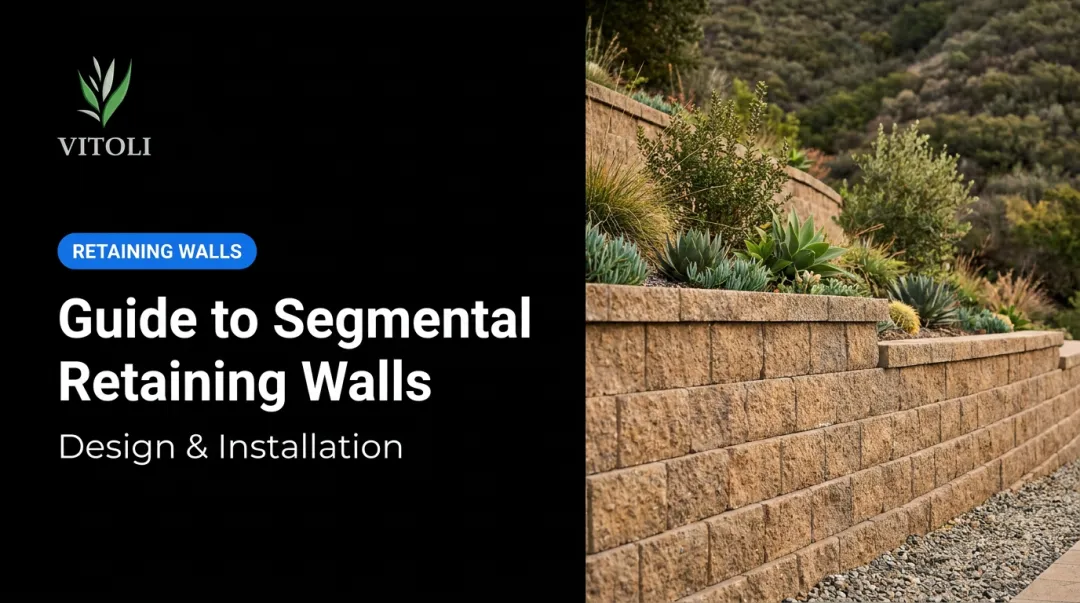
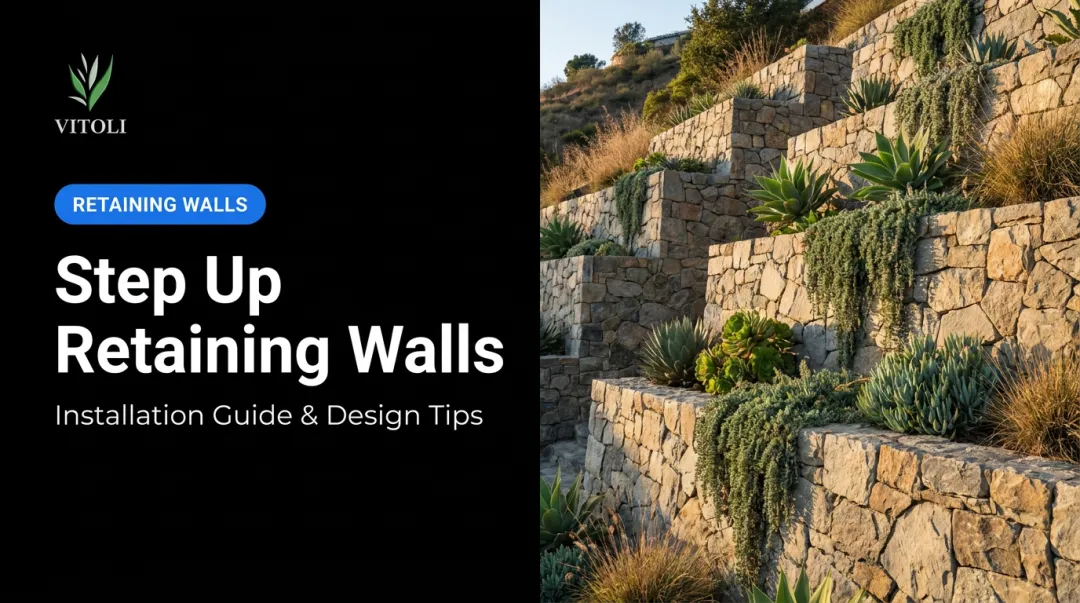
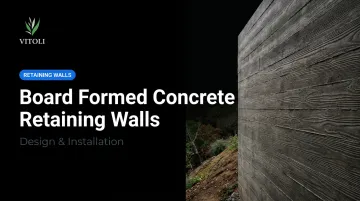
What Is a Board-Formed Concrete Retaining Wall?
Board-formed concrete uses rough-sawn or dimensional lumber as the interior face of a form system. When the concrete cures and the forms strip away, the wall permanently carries the wood's grain, knot patterns, and board seam lines as surface texture. The result is a wall that reads as raw and organic while being entirely structural concrete.
For hillside and landscape retaining walls, this technique makes particular sense. These walls are highly visible — often the dominant architectural element in a backyard or hillside lot — and the board-form finish allows a wall holding back tons of soil to function simultaneously as a refined design feature. It's well-suited to modern, organic, and contemporary Southern California outdoor living aesthetics, where the contrast between natural texture and clean geometry is desirable.
That design payoff comes with a dual execution requirement: the wall has to perform in two separate domains simultaneously. Structural engineering governs what happens inside — rebar placement, concrete mix, footing depth, load calculations. Formwork execution governs what shows on the surface — board selection, alignment, seam spacing, and stripping technique. Both have to be right, and neither can compensate for failures in the other.
Design & Engineering Requirements
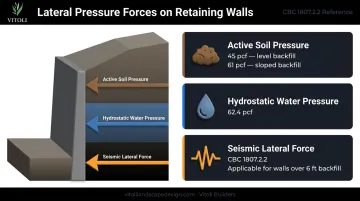
Before any discussion of boards, ties, or finishes, the wall must be engineered. Retaining walls are structural elements resisting lateral earth pressure — and that pressure increases dramatically with wall height, slope angle above the wall, and soil saturation.
Lateral Loads and Why Soil Saturation Changes Everything
LA County's Residential Code Manual uses minimum active pressure values of 45 pcf for expansive level backfill and 61 pcf for 2:1 sloped backfill. Water exerts a separate lateral pressure of 62.4 pcf at depth. When drainage fails and soil saturates, those pressures compound. That's why drainage design and structural design can't be treated as separate problems.
Seismic forces add another layer. Under CBC 1807.2.2, retaining walls supporting more than 6 feet of backfill in Seismic Design Categories D through F (which covers most of Southern California) require additional seismic lateral earth pressure analysis. For hillside walls in LA and Ventura Counties, treating the wall as an engineered site structure is the baseline, not an upgrade.
Footing, Reinforcement, and the 1/3 Rule
The 1/3 embedment rule is a common starting point: embed the wall to a depth equal to roughly one-third of its above-grade height. A 6-foot-tall wall needs approximately 2 feet of embedment. It's a useful benchmark — but not a substitute for engineering review on taller walls or sites with expansive soils, unstable fill, or high surcharge loads.
Footing design must account for:
- Frost depth and bearing capacity of native soil
- Overturning and sliding forces
- Expansive soil conditions (common on LA and Ventura County hillside lots)
For reinforcement, ACI 318-19 governs. Reinforcement spacing in cast-in-place concrete walls cannot exceed the lesser of 3 times the wall thickness or 18 inches, and concrete cover for reinforcement cast against and permanently in contact with ground requires a minimum of 3 inches. Undersizing rebar isn't just a code violation — it's a structural failure risk.
Permitting and Compliance
Under CBC Section 105.2, retaining walls over 4 feet from the bottom of the footing to the top of the wall require a building permit, as does any wall of any height supporting a surcharge or slope. Ventura County amends this threshold to 3 feet measured from finished grade on the lower side. Any wall requiring a permit in LA County must be designed by a registered design professional.
Key permit triggers to know before you build:
- Wall height exceeds 4 feet bottom-of-footing to top (LA County) or 3 feet from finished grade (Ventura County)
- Wall of any height supports a surcharge load or slope above
- Site falls within Seismic Design Categories D–F (standard for most of Southern California)
Vitoli Builders' in-house design and engineering team handles permitting coordination across Los Angeles and Ventura Counties. When structural design, drainage planning, and permit submissions need to move in parallel, having all three under one contractor eliminates the handoff delays that typically slow hillside projects down.
Step-by-Step Installation Guide
Board-formed retaining wall installation is not forgiving. Shortcuts in formwork preparation become permanent defects in the finished wall. The sequence below reflects professional practice, not the minimum viable approach.
Site Preparation and Prerequisites
Confirm all of the following before forming begins:
- Soil bearing capacity and compaction verified at the footing zone
- Footing trench excavated to correct depth, clean, and level
- Rebar installed, inspected, and approved
- Drainage outlet locations resolved
- Tie-back or deadman anchor requirements addressed for taller walls
- Concrete placement equipment access confirmed
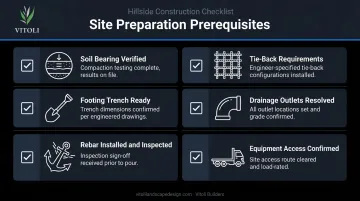
Do not proceed with open engineering questions. Rework after concrete placement is prohibitively expensive.
Formwork Construction and Board Preparation
Build one side of the form system first (typically a plywood-backed panel), then fasten the board-form lumber to its interior face. Board orientation (horizontal or vertical), width, and joint spacing are aesthetic decisions that must be finalized in design, not adjusted on the fly during forming.
For enhanced grain definition, boards can be ripped down the middle to expose fresh grain, then sandblasted to accentuate the contrast between dense winter growth rings and softer summer growth. This extra step produces noticeably sharper finish quality compared to nailing raw fence boards to the plywood backing.
On form ties: Use fiberglass ties on exposed board-form work, not steel. Steel ties rust and cause staining on the finished concrete face. Fiberglass ties can be ground flush after stripping with no patching required. Drill or route slots sized to allow tie loops to pass cleanly through the board layer.
Applying Form Release and Staging the Second Side
A high-quality reactive form release agent must be applied to boards and panels before staging the opposite form side. This step directly determines ease of stripping and surface quality. Do not substitute motor oil or improvised coatings — specify the correct release agent for the board species and project conditions.
Both form sides must then be tied, braced, and verified plumb. Wet concrete exerts substantial hydrostatic-like pressure on formwork. A single weak brace point can blow a form and ruin the pour.
Concrete Mix Selection and Placement
Specify a mix with sufficient cement content, moderate slump, and a high-range water reducer (superplasticizer) to improve workability without increasing the water-cementitious ratio. Per ACI 309R-96, a 3-inch slump is normally sufficient for properly vibrated concrete, and superplasticizers can deliver higher-slump concrete while preserving mix design integrity.
- Too stiff a mix: Creates honeycombing as concrete fails to fill tightly against the board face
- Too wet a mix: Can float boards or wash out cement at joints
Concrete placement in tall forms should use a pump hose or drop chute rather than free-fall from the form top. Per ASCC guidance, free-fall itself doesn't cause segregation when concrete falls vertically without striking rebar or form sides, but controlled lifts remain the professional standard for tall retaining wall forms.
Place concrete in lifts and vibrate each lift to consolidate around rebar and eliminate air voids. Avoid over-vibrating directly at the board face.
Stripping the Forms
Strip forms once concrete has reached sufficient self-supporting strength. Per ACI 347, the engineer or specifier should define the minimum strength before stripping. ACI standards don't support a universal 24-hour rule. In Southern California's warm climate, strength gain can accelerate, but stripping too aggressively risks tearing a still-green concrete face.
Strip in this sequence:
- Remove bracing
- Pull the panel (plywood) side
- Strip boards carefully from the concrete face
- Cut or grind fiberglass tie loops flush with an angle grinder or oscillating tool
- Inspect the full wall face immediately

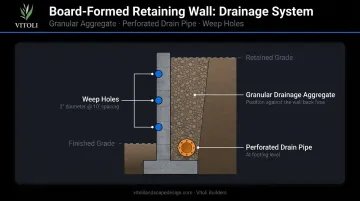
Drainage, Backfilling, and Post-Pour Validation
Drainage failure is the leading cause of premature retaining wall failure. Design it before backfilling begins.
Drainage System Design
A complete drainage system behind a board-formed retaining wall includes:
- Granular drainage aggregate — pervious material against the wall face to allow water to percolate
- Perforated drain pipe at footing level — collects and redirects water away from the wall base
- Weep holes through the wall face — Caltrans drainage details specify 2-inch diameter weep holes at maximum 10-foot spacing as a reference benchmark
Every drainage component must be placed before backfilling. No exceptions.
Backfilling and Compaction
Backfill in controlled lifts. FHWA guidance for engineered fill recommends loose lift thickness not exceeding 12 inches before compaction. Heavy equipment compacting directly against a freshly stripped wall risks cracking.
In expansive soil zones — common on LA and Ventura County hillside lots — replace native soil immediately behind the wall with engineered fill or clean gravel.
Post-Pour Inspection and Curing
Inspect the full wall face immediately after stripping for:
- Honeycombs — voids in the concrete surface
- Cold joints — lines where successive concrete lifts failed to bond
- Bowing — any deviation at form tie locations
- Weep hole blockage
ACI standards require concrete to be kept moist and above 50°F for a minimum of 7 days after placement — or 3 days for high-early-strength concrete — until the mix reaches 70% of specified strength.
In hot, low-humidity Southern California weather, rapid moisture loss accelerates surface cracking and weakens strength gain. Curing compound application or wet curing is especially important on exposed hillside pours.
Common Problems and Pro Tips
Blowouts and Form Failures
Problem: A form section fails under concrete pressure, resulting in a bulge or concrete loss.
Cause: Inadequate bracing, undersized ties, or concrete placed too rapidly without lift consolidation.
Fix: There is no mid-pour salvage. Stop the pour, assess. Full repair after curing typically involves demolition. Prevention through proper tie spacing and staged placement is the only reliable solution.
Honeycombing on the Board-Form Face
Problem: Voids and pitting appear on the decorative concrete face after stripping.
Cause: Mix too stiff, insufficient vibration near the board face, or concrete dropped from height through the form.
Fix: Small honeycombs can be patched with matched cement slurry while the concrete is still green. Large honeycombs may indicate structural compromise and require engineering review.
Board Impressions Not Transferring Clearly
Problem: The finished concrete face shows weak or inconsistent wood grain texture.
Cause: Insufficient board preparation, wrong form release agent, or mix slump too low to flow tightly against the board face.
Fix: None — this cannot be corrected after the pour. Prevention through a test panel is the professional standard.
Pro Tips for Success
- Test panel first. Build and pour a sample panel before committing to the wall. Confirm board treatment, mix design, tie placement, and texture quality — then show it to the client to align expectations before a single yard gets poured.
- Lock in aesthetics before forming begins. Board orientation, width, horizontal vs. vertical runs, and joint spacing all interact with the architectural context. None of it can be changed once the forms go up.
- Engage a hillside specialist early. On Southern California hillside walls, structural, drainage, permitting, and aesthetic variables are too interdependent to address in sequence. Working with a contractor like Vitoli Builders — who handles engineering, concrete, and landscape design under one roof — keeps those decisions connected from the start rather than fragmented across separate trades.
Frequently Asked Questions
How much does a board-formed concrete retaining wall cost?
National data from HomeGuide puts standard poured concrete retaining walls at $15–$45 per square foot for 3–6 foot walls. Board-formed walls run higher due to the added formwork labor, specialty boards, and surface preparation. Final cost shifts with wall height, soil conditions, drainage design, and engineering requirements.
What is the 1/3 rule for retaining walls?
The 1/3 rule holds that a retaining wall should be embedded to a depth equal to roughly one-third of its above-grade height — a 6-foot wall needs approximately 2 feet of embedment. Treat it as a starting-point minimum. Taller walls, sloped surcharge conditions, or poor soil typically require a full engineering review to determine actual embedment depth.
What is a board-formed concrete wall?
A concrete wall cast against rough-sawn lumber formwork. When the forms strip, the cured concrete permanently carries the wood grain, knot holes, and board seam impressions — combining structural durability with an organic architectural texture.
How long can you leave form boards on concrete?
ACI 347 ties stripping to the concrete reaching minimum self-supporting strength, not a fixed time window — your engineer sets that threshold. In Southern California, warm temperatures speed up strength gain, but stripping before the concrete is ready still risks surface damage on the board-form face.
Do I need a permit for a board-formed concrete retaining wall in California?
Most California jurisdictions require a permit for walls over 4 feet from the bottom of the footing to the top of the wall, per CBC 105.2. Ventura County's amendment lowers that threshold to 3 feet from finished grade on the lower side. Any wall supporting a surcharge or slope may require a permit regardless of height. Confirm requirements with your local building department before breaking ground.
What type of wood works best for board-forming a concrete retaining wall?
Rough-sawn Douglas Fir and Southern Pine are the most established species for concrete formwork, with pronounced grain that transfers well to the finished concrete surface. Boards can be sandblasted prior to forming to accentuate grain contrast. All boards must be treated with a form release agent before the pour to prevent bonding to the cured concrete.