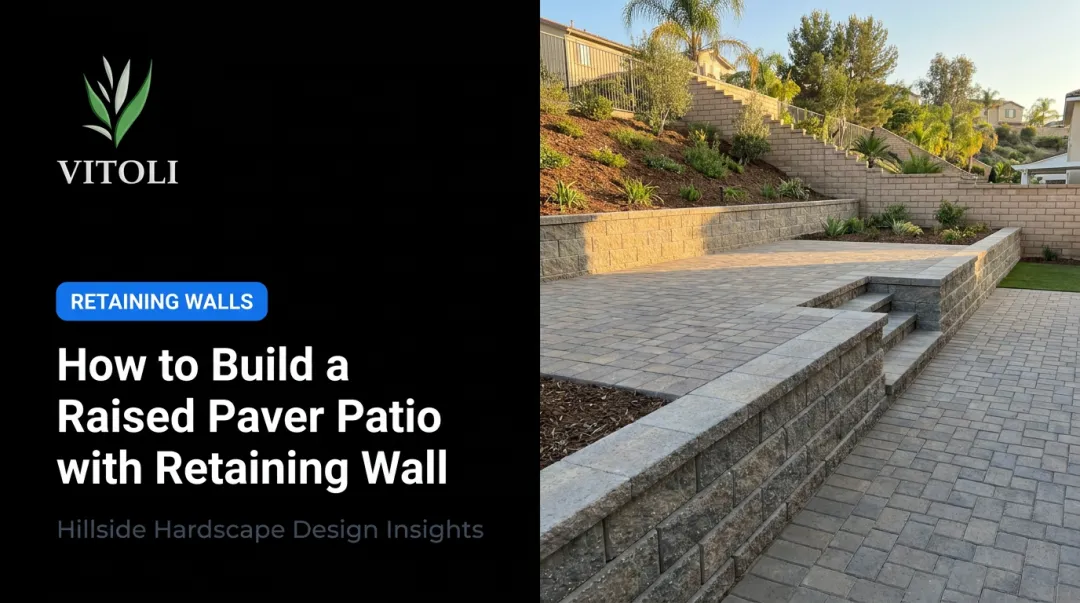
Paver steps solve all of this. Done right, they function as a hardscape feature and a structural upgrade — stable, attractive, and built to handle the specific pressures that hillside terrain creates. Done wrong, they settle, tilt, and fail within months.
This guide covers everything from calculating your step count and selecting materials to base preparation, installation sequence, drainage, and the common mistakes that cause most hillside paver step failures. Whether you're planning a DIY build or evaluating what a professional installation involves, the information here applies directly.
Key Takeaways
- Calculate step count before digging: total vertical rise ÷ target riser height (6–7 inches)
- A compacted gravel base of 6–8 inches is non-negotiable; under-compacting it is the leading cause of step failure
- Drainage must be designed in from the start, not added after installation
- Use textured or honed paver finishes on slopes; polished surfaces become a slip hazard in outdoor conditions
- Steep grades, unstable soils, or tricky drainage require a hillside specialist — not a DIY workaround
What You Need Before You Start
Three categories of pre-work determine whether a hillside paver step project succeeds or gets rebuilt in two years: slope assessment, tools, and materials. Skipping any one of them leads to costly rework.
Slope Calculation and Step Planning
Start with two measurements: total vertical rise (the height difference between the top and bottom of the slope) and total horizontal run (the horizontal distance across the slope).
- Step count = total rise ÷ target riser height (aim for 6–7 inches per step)
- Tread depth = total run ÷ number of steps (target 12–16 inches per tread)
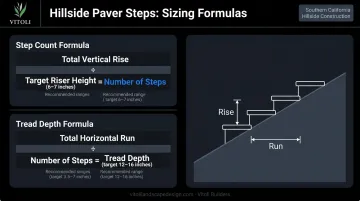
The 2022 California Residential Code sets the code-backed limits: maximum 7.75-inch riser height and minimum 10-inch tread depth. Stay within these ranges.
For comfort, Fine Homebuilding notes that riser height plus tread depth should equal approximately 18 inches — a useful design guideline, not a code requirement. A 6-inch riser paired with a 12-inch tread hits that target and creates a natural stepping rhythm.
Before any digging, mark the layout with stakes and string. This step reveals alignment challenges — whether the run is straight or curved, where steps fall relative to existing landscaping, and whether your step count needs adjustment. Adjustments at this stage cost nothing. The same change after excavation is a half-day of rework.
Tools and Materials Checklist
Essential tools:
- Tape measure and line level
- Rubber mallet
- Plate compactor (or hand tamper for smaller projects)
- Shovel and digging bar
- Stakes and string line
- Safety gear — gloves, eye protection
Essential materials:
| Item | Notes |
|---|---|
| Paver treads | Concrete, natural stone, or porcelain |
| Riser blocks | Retaining wall blocks or natural stone slabs |
| ¾-inch angular crushed gravel | Not rounded gravel — angular interlocks better |
| Coarse bedding sand or polymeric sand | Bedding layer and joint fill |
| Landscape adhesive | For securing risers on steeper slopes |
| Edge restraints + 10-inch landscaping spikes | Lateral containment |
| Geotextile fabric | Separation layer beneath gravel base |
Each paver material has trade-offs worth knowing before you order:
- Concrete pavers — cost-effective and widely available; the practical default for most projects
- Natural stone — strong aesthetic appeal, but requires a textured finish; the Natural Stone Institute's exterior paving guidance flags polished finishes on lower-abrasion stones as unsuitable for moderate or heavy exterior traffic
- Porcelain — low maintenance and good slip resistance when rated for exterior wet conditions
Regardless of material, avoid polished finishes on any outdoor hillside step.
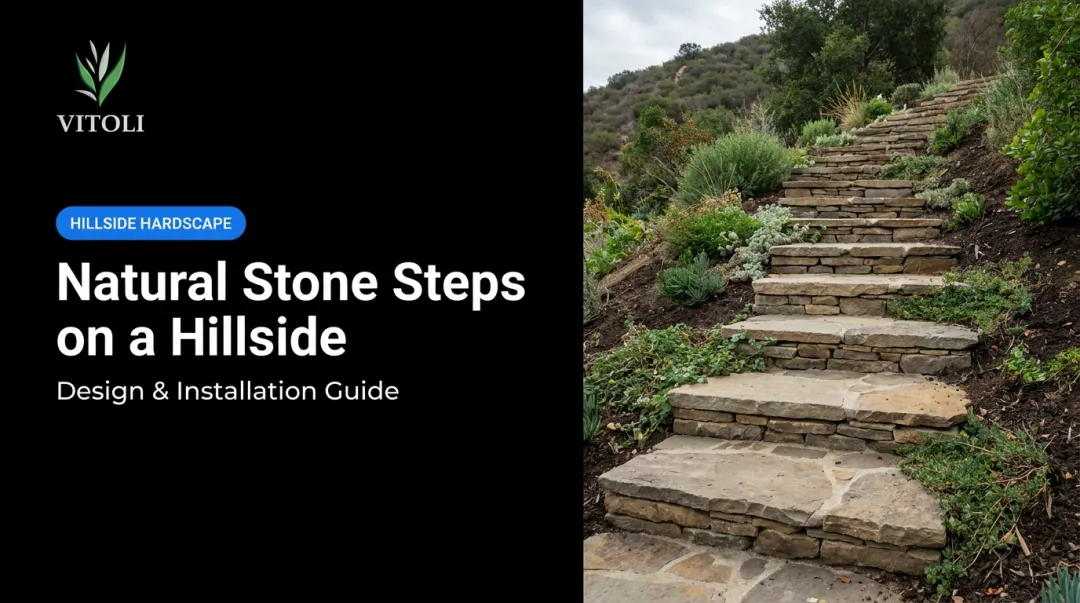
How to Build Steps on a Hill with Pavers
Step 1: Assess the Slope and Finalize Your Design
Measure total rise and total run, confirm your step count and tread depth using the formula above, and sketch the full staircase on paper with every dimension before breaking ground.
Include riser heights, tread depths, stair width, and drainage features in that sketch. Dimensions that look fine in your head often reveal problems on paper: an odd last step, a tread that's too shallow, or a drainage path cutting straight across a tread.
For hillside properties with significant grade, expansive soils, or existing drainage problems — all common across Los Angeles and Ventura Counties — a site assessment before excavation pays for itself. Design errors caught on paper cost far less than ones discovered after the concrete is poured.
Step 2: Mark the Layout and Excavate
- Use stakes and string to mark the perimeter and each step location
- Check side-to-side level with a line level — hillside steps that slope laterally become a tripping hazard
- Excavate each step to 6–8 inches deep, deeper for the bottom step
- Cut horizontally into the slope at each riser location to create a flat shelf
- Compact exposed soil with a hand tamper before adding base material
Of all the excavation work in this sequence, the bottom step matters most. It carries the load of every step above it and receives concentrated water runoff from the entire staircase.
Step 3: Build a Solid Gravel Base
This is where most DIY hillside step projects fail. An under-compacted base settles unevenly, and once it does, the steps above it follow.
Follow this sequence in order:
- Place geotextile fabric on the compacted soil to separate it from the gravel base
- Add ¾-inch angular crushed gravel in 2–3 inch lifts — not all at once
- Compact each lift thoroughly with a plate compactor before adding the next
- Build to a total depth of 6–8 inches (CMHA guidance cites this depth range for heavier-duty residential applications)
- Finish with a 1-inch layer of coarse bedding sand; screed level and incorporate a slight forward pitch of approximately ⅛ inch per foot to direct water away from the riser face
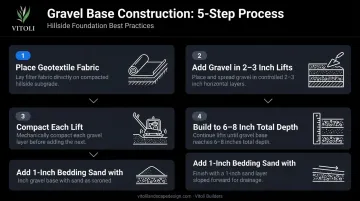
Angular gravel is specified for a reason: its irregular edges interlock under compaction. Rounded pea gravel shifts.
Step 4: Install Risers
- Place riser blocks on the compacted gravel base
- Use a level to confirm they sit plumb and even side-to-side
- For steeper slopes or high-traffic areas, secure risers with landscape adhesive or Type S mortar
- If stacking multiple riser courses, stagger the vertical joints — this distributes lateral load and prevents a straight shear plane through the structure
Risers that sit off-level create uneven tread surfaces above them. Check twice before moving to the next step.
Step 5: Backfill and Lay Paver Treads
Once each riser is set:
- Backfill the void behind the riser with additional compacted gravel
- Add the 1-inch sand bedding layer
- Place paver treads snugly against the riser face
- Check each tread for side-to-side level and confirm the forward pitch is maintained
- Tap pavers firmly into the sand bed with a rubber mallet
- Dry-fit and cut any pavers before gluing where a trimmed edge will be visible at the step nose
Cut edges at the nose of a step are visible from the approach. A poorly cut or chipped edge is the first thing visitors notice.
Step 6: Secure Edges, Fill Joints, and Address Drainage
- Install metal or plastic edge restraints along both sides of the stair run
- Drive 10-inch landscaping spikes every 12 inches along the restraints
- Sweep polymeric sand into all joints, tamp firmly, then mist lightly with water to activate the binding agent
- Allow polymeric sand to cure before heavy use
Drainage — don't skip this: Walk the site after a rain or after running a hose at the top of the slope. Observe where water flows. If runoff is significant, install a gravel trench or French drain alongside the steps.
A slight cross-slope away from the staircase also directs water without pooling on treads.
On Southern California hillside properties, CalGeo documents that expansive clay soils can swell and exert thousands of pounds of force when they absorb water. Drainage isn't optional on clay-heavy lots — it's a structural necessity.
Key Variables That Affect Hillside Paver Step Results
Two hillside paver step projects with identical materials can produce very different outcomes. Four variables determine which result you get.
Slope Grade and Step Geometry
Steeper grades place more structural demand on the riser system and increase the risk of soil movement beneath the base. There's no single universal slope percentage that mandates engineered retaining walls — that determination depends on soil conditions, local grading codes, and the load the structure must carry. As grade increases, so does the consequence of any base or drainage shortcut.
Riser and tread dimensions have code-backed limits for good reason. Inconsistent step heights — even a ½-inch variation between steps — create tripping hazards and may fail inspection.
Base Depth and Compaction Quality
The Caltrans Standard Specifications require aggregate base to be compacted to at least 95% relative compaction for road base applications. For residential paver steps, the governing standard depends on the project specification, but the principle holds: under-compacted lifts create weak spots that settle unevenly under foot traffic and moisture.
Per CMHA maintenance guidance, depressions in paver surfaces are commonly caused by inadequate compaction of the base or subgrade, or by saturation of those layers. Running a compactor once over a full gravel load doesn't achieve proper density. Multiple thin lifts, each compacted independently, do.
Drainage Design
Compaction sets the structural foundation — drainage determines whether it holds long-term. Three components work together to move water away from the steps:
- Gravel base — allows subsurface water to percolate rather than pool beneath pavers
- Tread pitch — directs surface runoff away from the riser face
- French drain (optional) — intercepts lateral water flow uphill of the step system
On Southern California hillsides with clay-heavy soils, drainage failure doesn't just damage the steps. It erodes the soil beneath the base, causing uneven collapse.
Paver Material and Surface Finish
| Material | Slip Resistance | Freeze-Thaw Notes | Maintenance |
|---|---|---|---|
| Concrete pavers | Good with textured finish | ASTM C936 covers freeze-thaw durability | Low; prone to efflorescence |
| Natural stone | Variable — texture required | Depends on stone properties | Higher; sealing may be needed |
| Porcelain (exterior-rated) | Good when rated "Exterior, Wet" | Verify frost-resistance separately from slip rating | Low |
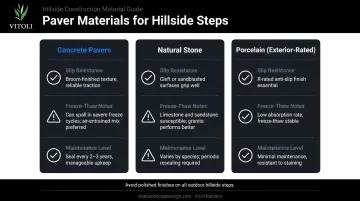
Polished finishes don't belong on outdoor hillside steps. Specify textured or honed finishes regardless of material.
Common Mistakes When Building Hillside Paver Steps
Most hillside paver step failures trace back to a handful of avoidable errors. Knowing what to watch for before you start saves time, money, and a potential code violation.
- Under-compacting the gravel base — Uncompacted base material settles unevenly under foot traffic and hillside moisture, causing steps to tilt, crack, or shift, often within the first rainy season. It's the most frequent and most costly mistake on hillside step projects.
- Treating drainage as an afterthought — Water runoff accelerates erosion beneath and around paver steps. Drainage channels, base pitch, and joint materials all need to be planned before the base is laid, not retrofitted after the steps have already started moving.
- Inconsistent riser heights — Steps outside the 6–7 inch riser and 12–16 inch tread range are uncomfortable to climb. Inconsistent heights between individual steps are a tripping hazard — and in California, a likely trigger for a code inspection failure. The CRC cap of 7.75 inches and minimum tread of 10 inches are hard limits.
- Skipping edge restraints — Without restraints, lateral forces from foot traffic and soil movement gradually spread paver treads apart, creating gaps and instability. The restraints take under an hour to install; correcting the spread later costs considerably more.
When to DIY vs. Hire a Hillside Specialist
When DIY Is Realistic
An experienced DIYer can succeed when:
- Slope is gentle — under 20%
- Project involves fewer than 8–10 steps
- Soil is stable and well-drained
- No existing erosion or drainage problems
- Access to a plate compactor (rent one — a hand tamper alone isn't adequate for most hillside bases)
When to Call a Professional
The project conditions that call for professional involvement:
- Steep or unstable hillsides where soil movement is already visible
- Expansive clay soils — prevalent across Southern California — that swell and shift with moisture
- Significant existing runoff or erosion that requires engineered drainage solutions
- Retaining walls needed alongside the steps — in LA County, retaining wall design requiring a building permit must be performed by a registered design professional
- More than 10 steps or significant grade changes

If your project hits any of these conditions, working with a hillside specialist makes a measurable difference. Vitoli Builders serves Los Angeles County and Ventura County homeowners with over 20 years of experience in slope assessment, drainage design, and complete hardscape installation — the disciplines that matter most when a hillside paver project moves beyond DIY territory.
Frequently Asked Questions
Can pavers be used on a slope?
Yes — pavers work well on slopes when the base is properly compacted, drainage is designed into the build, and the surface finish is appropriate for outdoor wet conditions. Textured or honed finishes are required; polished surfaces become slip hazards when wet.
What is the 18-inch rule with stairs?
The 18-inch rule is a comfort guideline: riser height plus tread depth should total approximately 18 inches. A 6-inch riser paired with a 12-inch tread is a common example. This is not a code requirement — the California Residential Code sets the binding standards at a 7.75-inch maximum riser height and 10-inch minimum tread depth.
What is the best base material for paver steps on a hillside?
¾-inch angular crushed gravel, compacted in 2–3 inch lifts to a total depth of 6–8 inches, topped with a 1-inch layer of coarse bedding sand. Angular gravel is preferred over rounded because its irregular shape interlocks under compaction, creating a more stable base.
How do I prevent erosion under hillside paver steps?
Place geotextile fabric between the native soil and the gravel base to prevent fines from migrating upward. Compact the base properly, maintain a slight forward pitch on each tread, use polymeric sand in joints to resist water infiltration, and install drainage channels beside the steps if runoff is significant.
How wide should hillside paver steps be?
The IRC and California Residential Code require a minimum of 36 inches of clear width for residential stairways. For comfortable two-way use, 48–60 inches is a practical design preference. Wider steps also reduce the visual sense of steepness and improve proportion on hillside landscapes.
Do I need a permit to build paver steps on a hillside in California?
It depends on scope and jurisdiction. In LA County, grading permits are generally required when earthwork exceeds 50 cubic yards, subject to specific exemptions. Retaining walls alongside steps require a separate permit and must be designed by a registered professional. Ventura County has similar thresholds. Check with your local building department before starting — and for complex hillside projects, Vitoli Builders — a hillside construction specialist serving LA and Ventura County — can help navigate local requirements.